#rankmath
Title: Distressed Denim Quality Control for Brand Buyers
Description: Use distress maps, structural-zone rules, wash approvals and bulk controls to approve distressed denim with fewer avoidable surprises.
Keyword: distressed denim quality control
#rankmath
Distressed Denim Approval: Placement, Fabric Strength, Reinforcement and Repeatability
Distressed denim is not approved by saying “make it more destroyed.” A usable approval system translates the visual idea into controlled locations, protected construction areas, a finished-garment reference, and a repeatable inspection method.
For fashion brands, streetwear labels, and wholesale buyers, the challenge is balancing a deliberately worn appearance with a garment that still behaves as intended. Abrasion, holes, fraying, bleaching, sanding, washing, and softening can all change the cloth and the measurements. The relevant approval point is therefore the finished garment, not an unwashed sewing sample. A denim manufacturing buyer guide likewise recommends approving wash look, hand feel, and finished measurements before bulk production. Antor’s denim manufacturing guide
JUNSHEEN supports OEM, ODM, and private-label apparel development, including denim and stretch denim, with sampling, wash treatments, size-set fitting, and bulk-production coordination. For a product conversation, start with JUNSHEEN or review its Custom Men’s Distressed Jeans Production Partner page.
Start with a distress map, not a mood board

A reference image establishes direction, but it rarely supplies enough instruction for production. It may hide the garment’s original pattern, size, wash sequence, fabric composition, stretch behavior, or whether a rip was manually developed for photography. Convert it into a distress map before sampling.
A distress map should use front, back, and side garment views at a stated base size. Mark each effect with an identifier and record its relationship to construction features: inseam, outseam, side seam, pocket edge, fly, waistband, hem, yoke, belt loop, and knee.
For every identifier, specify:
- Effect type: abrasion, hole, frayed opening, whisker, fading, bleach effect, repair patch, or another defined treatment.
- Exact placement: dimension from a stable landmark, such as the top waistband edge, inseam junction, or side seam.
- Intended shape and scale: use a sketch, photo markup, or physical sample rather than words such as “small” or “heavy.”
- Edge character: clean cut, broken yarns, controlled fray, backing visible, or no backing visible.
- Allowed relationship to seams and hardware: for example, whether an abrasion may cross a pocket edge or must stop short of it.
- Size behavior: whether placement scales with the graded pattern or remains a fixed distance from a landmark.
This turns design intent into something a sample room, wash team, and final inspector can compare. It also prevents a common failure: a distress that looks centered on the sample but shifts too close to a seam or pocket in another size.
Define an approval hierarchy
Not every visual detail needs the same tolerance. Classify items in the tech pack as:
| Approval class | Typical items | How to control it |
|---|---|---|
| Critical | Hole placement near a knee, exposed backing, pocket damage, logo-adjacent effects | Match approved location and construction approach before bulk |
| Controlled variation | Fray length, fading intensity, yarn break pattern | Set a visual range using approved photos or panels |
| Natural variation | Minor irregularity inherent to the selected process | State what remains acceptable and what becomes a reject |
The point is not to eliminate variation. It is to distinguish intentional variation from uncontrolled damage.
Protect structural zones before choosing the strongest look
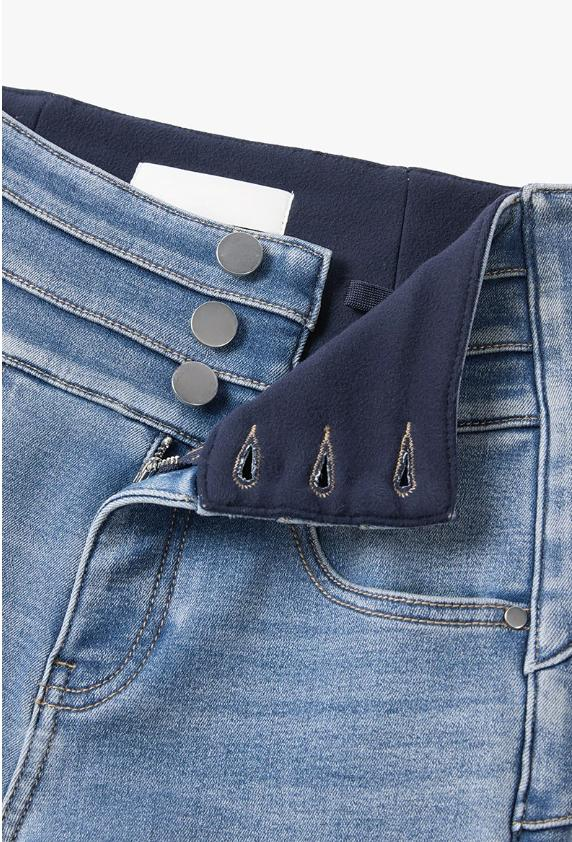
A distress may be decorative, but it sits on a garment that must still be worn, laundered, and handled. Buyers should identify structural zones first and decide where the distress must not cut, abrade, or materially weaken the garment.
Common protected zones include the waistband and belt-loop attachment areas; fly and zipper area; pocket corners and pocket-bag openings; crotch and inseam junctions; seat seams; side seams; hem turn-up; and the immediate vicinity of rivets, buttons, snaps, or embroidery. The exact protected area should be based on the garment pattern and approved design, not copied blindly from another style.
The knee deserves separate attention. It is a natural location for distressing and also a flex point in wear. A large opening may be visually correct while becoming unstable if its edges are close to a seam, are cut across vulnerable yarn directions, or continue to open after washing. The buyer’s job is to approve the desired opening and the intended boundary of future fraying—not simply the first appearance.
A useful sample-room instruction is: “Distress must stop before the protected boundary; any exception requires written sample approval.” This is a recommendation for production control, not a universal standard.
Review reinforcement as a design decision

Reinforcement should be visible in the specification whenever the design relies on a hole, a large worn area, or a placement near a structural zone. Do not assume that backing is either always required or always undesirable. The correct choice depends on the intended appearance, fabric construction, stretch, wash treatment, and the specific location.
Possible approaches include an underlay or backing patch, a repair-style panel, controlled stitch reinforcement, or leaving an area unbacked after the development sample demonstrates acceptable behavior. Describe the approach visually from both the face and inside of the garment.
Review these questions on the finished sample:
- Does the reinforcement stay hidden where the design calls for an open hole?
- Does it create an unwanted rigid patch, shine, color contrast, or bulky edge?
- Are its edges secured in a way that changes the desired fray?
- Does the distressed opening remain within its intended shape after the full wash and finishing sequence?
- Does the reinforcement interfere with stretch or recovery where the garment bends?
Denim washes and distressing can reduce fiber tightness, and the effect on strength is best assessed after washing and finishing rather than on unprocessed cloth. Innblac’s tear-strength overview also recommends considering both warp and weft directions and testing after finishing when tear strength is a program requirement.
Evaluate fabric strength without inventing a pass/fail number

Fabric weight alone does not establish whether a distressed style is fit for purpose. Composition, construction, stretch content, yarn quality, seam placement, wash recipe, and the severity of the abrasion all matter. Avoid approving a style based on a generic “heavyweight equals durable” assumption.
Instead, write a strength-validation plan appropriate to the product and market. It may include supplier or third-party testing when your retail program, risk assessment, or customer requirements call for it. The test method, sampling plan, acceptance criteria, and party responsible should be agreed before testing begins.
ASTM D1424 and ASTM D2261 are described as tear-test methods in the supplied denim testing reference; that reference characterizes D1424 as an Elmendorf tear method and D2261 as a tongue-tear method. Innblac’s tear-strength overview Whether either method is suitable, and what result is acceptable, is a brand- and program-specific decision. Do not present a supplier’s internal target as a legal requirement.
For a high-risk distressed style, compare finished garments from the intended production route, not merely fabric swatches. Inspect the decorative zone, nearby non-decorative zones, seams, and reinforcement after the actual wash sequence. If the style uses stretch denim, assess it on a body or fitting form as well as flat, because opening shape can change under extension.
Treat wash interaction as part of fit approval

The wash is not a final cosmetic step. It can alter color, contrast, hand feel, edge fray, dimensional behavior, and the relationship between a distress mark and a pattern landmark. A pre-wash fit sample may therefore be useful for construction review, but it cannot replace approval of the completed washed garment.
Ask for a wash panel or development sample when the effect is still being selected. Then lock the approved reference with clear images, inside views where reinforcement is relevant, and finished measurements. The buyer guide from Antor specifically places wash and finishing after cut-and-sew and recommends agreement on wash recipe and measurement changes before bulk. Antor’s denim manufacturing guide
Watch for four interactions:
- Measurement movement. Confirm the garment is measured in the same finished condition used for approval.
- Effect movement. Recheck distance from seams, pockets, fly, and hem after wash.
- Fray development. Confirm that abrasion and openings do not become materially larger than the approved visual range.
- Color contrast. Ensure the approved fading, bleach, or abrasion effect still reads correctly against the final ground shade.
Build repeatability into the pre-production package

The approved sample is evidence of a target, not a complete bulk instruction. Repeatability depends on retaining the records that explain how that target was achieved.
Your pre-production package should include the approved physical sample; dated photos of front, back, side, and detail zones; base size and graded size information; pattern revision; fabric and trim identification; distress map; wash and finishing instructions; reinforcement details; finished measurement specification; and an inspection reference showing acceptable versus unacceptable variation.
For reorders, preserve the same package and record every authorized change. A fabric substitution, different stretch behavior, revised wash, pattern update, or new distress operator can affect the result. Do not call a reorder “the same” until the retained references have been checked against the proposed materials and process.
Sample-approval checklist for distressed jeans
Use this checklist at pre-production approval:
- Confirm the approved sample is the finished, washed garment.
- Verify base size, pattern revision, fabric identity, and applicable trim details.
- Compare every numbered distress location to the approved map.
- Measure critical placements from stated garment landmarks.
- Inspect protected zones, seams, pocket corners, fly, crotch, and waistband for unintended damage.
- Review reinforcement from the face and inside of the garment.
- Check whether distressed openings and fray match the approved visual range.
- Confirm finished measurements and fit are reviewed in the finished condition.
- Photograph the approved reference and attach it to the pre-production record.
- Document any allowed variation in writing before bulk begins.
Bulk-production control checklist
During bulk production, use the approved sample and visual pack at in-line and final inspection:
- Pull units across the production run rather than reviewing only the first completed garments.
- Compare critical distress placement to the approved landmarks.
- Check that protected zones remain intact except where an approved design exception exists.
- Compare fray, opening size, fading, and reinforcement visibility with the approved reference range.
- Review finished measurements after the relevant wash and finishing steps.
- Segregate units with unintended holes, seam damage, shifted effects, exposed backing, or unacceptable visual deviation for review.
- Record batch, wash, and corrective-action information so a repeat order can use the learning.
JUNSHEEN’s stated workflow includes sample approval of fit, measurements, construction, wash, and decoration before bulk, followed by fabric, in-line, measurement, fit, decoration, and final inspections. For a quote, send the distress map, reference sample or images, size range, target quantity, fabric direction, and required delivery market through JUNSHEEN.
FAQ
Should every distressed opening be reinforced?
No. Reinforcement is a design and risk decision. Specify and approve it where needed for the intended appearance and structural behavior, then review it after the finished wash process.
Can a photo reference replace a distress map?
No. A photo can show style direction, but a map gives production teams placements, protected boundaries, size behavior, and approval priorities.
When should a buyer assess measurements?
Assess final measurements on the finished garment condition that represents the approved product. Wash and finishing can affect dimensional behavior. Antor’s denim manufacturing guide
Are tear tests mandatory for every distressed denim style?
Not universally. Testing needs depend on the product, sales channel, buyer requirements, risk assessment, and applicable obligations. If testing is required, agree the method and acceptance criteria before production.