#rankmath
Title: Embroidery Digitizing for Apparel: Buyer Approval Guide
Description: Approve embroidered apparel with a practical workflow for digitizing, stitch density, backing, placement, garment distortion and repeat production.
Keyword: embroidery digitizing for apparel
#rankmath
Embroidery Digitizing for Apparel: Stitch Density, Backing, Placement and Sample Approval
Embroidery digitizing for apparel is not simply the conversion of a logo into a machine file. It is the technical translation of artwork into stitch paths that must work with a specific garment, fabric construction, placement, backing, thread selection, and production method.
For fashion brands and wholesale buyers, the commercial risk is usually not whether a logo can be embroidered. It is whether the approved result stays legible, balanced, comfortable, and repeatable when it moves from a sample garment into bulk production. A dense chest logo can pucker a lightweight jersey; a detailed artwork file can lose critical features at a small sleeve placement; an unplanned patch seam can interfere with a pocket or zipper.
JUNSHEEN supports OEM, ODM, and private-label apparel development, including embroidery, sampling, fit development, trims, and bulk production. Its programs cover XS–3XL development and begin from 100 units per style/color, subject to fabric and craft complexity. Buyers can begin decoration planning through Custom Embroidery Services and coordinate the wider garment program with JUNSHEEN.
Start with artwork that can be stitched

A digitizer needs more than a vector logo. The file should be treated as a production brief: it communicates what the brand considers non-negotiable and what may be simplified to make the design sew cleanly.
Fine outlines, very small lettering, narrow gaps, gradients, photographic shading, and overlapping color effects often need adjustment before embroidery. That is not a change in brand intent; it is a practical response to thread thickness, stitch direction, fabric movement, and the final decoration size.
Provide the following before digitizing:
- Editable vector artwork where available, plus a reference image showing intended colors.
- The actual or proposed garment fabric, color, and construction.
- Decoration location and intended dimensions, measured from stable garment reference points.
- Whether the application is flat embroidery, puff embroidery, chain stitch, appliqué, a patch, or a mixed technique.
- The intended size range, including whether the logo location must remain visually consistent across graded sizes.
- A clear priority order: exact detail, hand feel, durability, speed of production, or a deliberately textured appearance.
Ask the factory to identify any artwork features that will be merged, widened, removed, or converted to a different stitch treatment. An approval should cover the revised production artwork, not only the original design file.
Define the stitch strategy, not only the logo colors
Common stitch families serve different visual purposes. Fill stitches cover broad areas; satin-style coverage is commonly used for borders, lettering, and narrow shapes; running stitches can define details or create lighter linework. The right combination depends on the shape, the garment, and the desired surface effect.
A streetwear graphic with large filled forms may benefit from deliberate texture and selective open space. A small left-chest wordmark usually depends more on letter clarity, spacing, and edge definition. Puff embroidery introduces another set of decisions because foam, cover stitches, and edge treatment affect the finished height and shape.
Do not approve a digitized design solely from a screen preview. A preview can indicate stitch order and visual composition, but it cannot show puckering, coverage, thread shine, garment drape, or how the design behaves after handling and laundering.
Treat embroidery stitch density as a fabric-specific decision

Embroidery stitch density describes how closely stitches are arranged in a filled area. It affects coverage, texture, thread consumption, stiffness, and the amount of force placed on the garment during stitching.
There is no single density setting that is correct for every apparel program. A digitizing approach suitable for a stable twill cap panel may be inappropriate for a soft, stretchy T-shirt. Dense coverage can improve opacity, but it can also make an embellished area rigid or contribute to distortion. Sparse coverage may preserve drape, but it can expose the base fabric or make the artwork look weak.
The buyer’s approval question should be: does the selected stitch density produce the intended visual coverage without creating unacceptable stiffness, puckering, or shape change on this garment?
Evaluate density alongside:
- Fabric weight, stretch, recovery, surface texture, and stability.
- Garment construction near the decoration area, including seams, rib, pockets, plackets, zippers, and lining.
- Size of the embroidered area relative to the garment panel.
- Thread color contrast and whether base fabric can show through.
- Stitch direction, underlay, and sequence, which can influence pull and visual texture.
- The expected hand feel against the wearer, especially on lightweight tops or interior-facing decoration.
A sample can reveal that the issue is not density alone. Registration may be affected by stitch direction, a narrow letter may need a different treatment, or the backing may be insufficient for the selected fabric. Ask for the corrective action in production terms rather than requesting a vague "higher quality" result.
Select backing for garment support and wearer comfort

Backing stabilizes the fabric while the design is sewn. It is part of the embroidery construction, not an afterthought. The appropriate choice depends on the garment and embellishment area.
For a buyer, the practical review is whether backing provides sufficient support while maintaining the intended drape and comfort. Lightweight knits, stretch fabrics, fleece, structured wovens, and outerwear shells may need different handling. A backing approach that keeps a logo stable on a sweatshirt may leave an unwanted hand on a lightweight tee.
Ask the supplier to state:
- Backing type and whether it remains in the garment or is removed after sewing.
- Whether an additional topping or temporary support is proposed for textured fabric.
- How the selected backing affects the reverse side, comfort, and garment drape.
- Whether the backing plan changes by fabric, colorway, placement, or decoration size.
- How edges, loose ends, and reverse-side appearance will be controlled.
Where comfort matters, inspect the inside of the approved sample as closely as the front. This is especially important for chest placements, children’s apparel, close-fitting garments, and styles where an embroidery sits directly against skin.
Set placement from garment landmarks
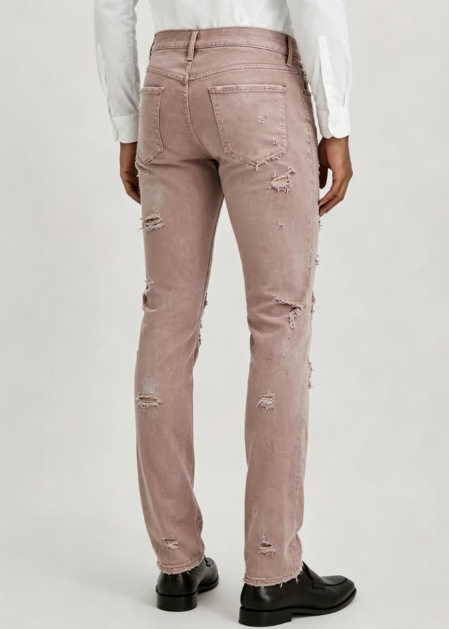
Placement should be communicated with measurements from stable landmarks rather than descriptions such as “high chest” or “near the hem.” Use reference points that a production team can locate consistently: center front, neck seam, shoulder seam, placket edge, pocket edge, side seam, cuff edge, or bottom hem.
A complete placement instruction identifies the garment size used for approval, the reference point, the measurement, orientation, design dimensions, and any allowed variation. It should also say whether the placement is fixed for every size or adjusted across the graded size set to maintain the intended visual balance.
This matters for extended-size and oversized products. A placement that looks centered on a sample size can sit too close to the armhole, pocket, or neckline after grading if the rule is not defined. For a boxy or drop-shoulder silhouette, the visual center may not match a simple geometric center.
Review distortion before bulk approval
Embroidery can draw fabric inward, shift a panel during hooping, or create a visibly firmer area. This risk increases when the garment is soft, stretchy, brushed, ribbed, washed, or heavily embellished.
Inspect the sample garment both flat and worn or draped on a form. Look for puckering around the design, skewed lettering, cupping, fabric show-through, uneven borders, thread breaks, exposed backing, and a logo that sits differently once the garment stretches. Also check that the decoration does not cross a seam, pocket bag, zipper tape, or seam allowance in a way that interferes with construction.
If the design is garment-dyed, washed, brushed, or otherwise finished, approve the embroidery in the intended order of operations. Decoration before and after finishing can produce materially different appearance and hand feel.
Sample approval workflow for embroidery programs
A disciplined approval flow reduces ambiguity between design, development, and bulk teams.
1. Confirm the production brief
Lock the artwork version, garment style, fabric, colorway, decoration method, placement, and intended size range. Flag any trim or construction feature that occupies the decoration zone.
2. Review the digitizing recommendation
Ask for a clear explanation of planned stitch types, simplification, density approach, backing, thread colors, and any limitations. Ensure the brand approves changes to fine details before the sample is made.
3. Evaluate the sewn sample
Review the face and reverse side on the actual garment. Compare size, placement, readability, color, surface texture, hand feel, and distortion against the approved brief.
4. Record corrections as measurable instructions
Use concrete requests: move the design relative to a named landmark; enlarge a gap; change a border treatment; reduce stiffness; revise a thread color; or change backing. Attach marked photos when possible.
5. Issue a pre-production approval
Before bulk production, confirm the final artwork version, approved sample reference, placement specification, backing construction, thread colors, garment fabric and colorway, and any size-specific placement rule. Retain these records for reorders.
Compact buyer guide: questions and red flags

Before requesting a quote or sample, use this decision checklist:
| Buyer check | What to confirm |
|---|---|
| Artwork | Which details will be simplified or converted for stitching? |
| Garment | Is the digitizing plan based on the actual fabric and construction? |
| Density | Does the sample have sufficient coverage without unwanted stiffness or distortion? |
| Backing | What support will remain on the reverse side, and is it acceptable for the wearer? |
| Placement | Are measurements tied to stable garment landmarks and an approved size? |
| Grading | Does placement need an adjustment rule across sizes? |
| Trims | Does the embroidery clear pockets, zippers, labels, seams, and other trims? |
| Repeats | Will the approved file, thread colors, backing plan, and placement spec be retained? |
Useful RFQ questions include: “Which garment sample will you use to test the digitized file?”; “What changes do you recommend to preserve lettering and negative space?”; and “What is the approval reference for bulk operators?”
Red flags include a supplier that approves artwork without seeing the intended fabric, provides no written placement reference, treats a screen preview as final proof, or cannot identify how the approved sample will be matched in repeat production.
Build repeatability into the bulk-production handoff
For reorders, retain the approved production file and the decision record around it. A repeatable embroidery specification links the digitized artwork to a particular garment program: fabric, colorway, placement, backing, thread colors, size rule, and sample reference.
Do not assume the same artwork will perform identically on another fabric, garment color, or silhouette. A logo moving from a fleece hoodie to a lightweight jersey, or from a centered back application to a pocket area, should be reviewed as a new application even when the artwork is unchanged.
JUNSHEEN’s development process includes sampling and approval of decoration before bulk production, with retained patterns, graded size sets, and fabric records supporting reorder programs. For an embroidery RFQ, send the artwork, garment concept or tech pack, quantity, target size range, colorways, intended placement, and reference samples if available. Contact JUNSHEEN through its website or email Cherry Liu at cherry@junxinclothing.com to discuss a custom apparel program.
FAQ
What is embroidery digitizing for apparel?
It is the preparation of a stitch file and sewing plan that converts artwork into an embroidery application suitable for a specified garment, placement, and fabric.
Can one digitized file be used on every garment?
Not automatically. The same artwork may need adjustment when fabric stretch, weight, surface texture, garment construction, placement, or intended decoration size changes.
How should a brand approve embroidery stitch density?
Approve a sewn sample on the intended garment. Assess coverage, edge clarity, fabric distortion, stiffness, and the reverse-side backing—not only the digital preview.
What should be included in an embroidery approval record?
Include the approved artwork version, garment and fabric reference, placement measurements, design dimensions, stitch and backing approach, thread colors, sample images, corrections, and bulk approval reference.
Sources
No external research sources were supplied for this assignment. This article uses the supplied JUNSHEEN brand profile for brand-specific information and provides non-numeric, practical manufacturing guidance.