Zipper waviness after washing is usually an assembly-and-material compatibility question, not proof that one component is defective. Review the zipper, garment fabric, seam construction, and wash route together. Compare controlled pre-sewing, sewn-unwashed, and washed-and-relaxed samples before approving bulk production, then use the visible pattern of distortion to decide what to investigate next.
Start by naming the defect accurately
Buyers often call every uneven center-front closure a “wavy zipper.” That shorthand makes approvals harder because several different problems can look similar in a flat photograph.
Wavy zipper chain or tape means the zipper itself appears to snake, buckle, or sit in alternating waves along the opening. The tape may look longer or shorter than the garment edge, and the chain line can lose its intended straight path.
Seam puckering is gathering beside the zipper seam. The zipper may be straight while the fabric is drawn into small ripples by sewing tension, feeding behavior, seam allowance bulk, or a locally unstable fabric edge.
Front-panel distortion is a larger shape problem in the garment. One front can twist, pull outward, or sit off-grain; the zipper merely reveals the imbalance. A zipper replacement alone may not correct it.
This distinction matters commercially. A zipper that functions smoothly can still create a poor visual line. Conversely, a visibly rippled seam may have sound tape and chain but need a construction change. Treat the zipper as a structural part of the opening rather than a decorative trim: uneven tape placement or misaligned teeth can alter the slider path, while inappropriate pressure or needle selection can let fabric creep during sewing. LenZip’s zipper sewing guidance

Why washing can reveal a problem that the sewing line hid
A sewn-unwashed sample can look acceptable because pressing, handling, or temporary tension is holding the opening flat. Washing, drying, and relaxation remove some of that temporary balance. If the fabric edge, zipper tape, interfacing, and stitches change shape differently, the seam has to accommodate the difference somewhere. It often shows as a wave beside or along the zipper.
This is differential dimensional behavior: attached materials do not necessarily respond alike to wet processing, heat, mechanical action, or relaxation. It is a useful hypothesis, not a diagnosis. A buyer should not assume that the fabric shrank, that the tape shrank, or that sewing alone caused the result until the comparative samples are reviewed.
Material selection can be part of the hypothesis. Hoshima identifies a mismatch between stretch fabric and zipper rigidity as one possible source of waves or puckering, and also flags sewing technique, grain alignment, and post-sewing pressing as possible contributors. Hoshima’s overview It is not a substitute for your garment’s own approval sample, nor does it establish a universal remedy.
The wash route matters because a zipper opening is not an isolated tape. Consider the intended garment wash, drying route, pressing sequence, and any finishing treatment that follows sewing. Also consider whether the zipper is installed before or after a treatment. The buyer’s purpose is not to prescribe a universal preshrink recipe or heat setting; it is to make the proposed sequence visible and approve the assembled result under the intended product conditions.
Compare three stages, not one sample
An isolated swatch can be useful for early material screening, but it cannot replace a sewn garment review. The seam has additional variables: two garment fronts, seam allowance, interfacing or facing, stitch formation, topstitching, zipper tape, and construction handling.
Use three reference stages for the same development route.
Pre-sewing component check
Review the garment fabric, zipper, facing or interfacing, and any stabilization material before assembly. Confirm the correct zipper length, chain type, pull, tape color, and tape width against the approved trim specification. Place the zipper beside the cut opening edge without stretching either part. This is an observation of compatibility, not a pass by itself.
Check the fabric direction at the opening and identify areas that are particularly elastic, loosely constructed, bias-influenced, or thick at seam intersections. Examine the proposed facing and interfacing as a system: a very stable support beside a more mobile panel can change how the opening relaxes, while too little support may allow the edge to grow during construction.
Sewn-unwashed assembly check
Evaluate a complete sewn sample before wash. Lay it flat, hang it briefly, close and open the zipper, and inspect both sides of the chain. Look for unequal tape visibility, a shifted center front, teeth that sit at different heights, stitch encroachment near the chain, or rippling created while the garment is handled.
This stage isolates assembly behavior better than a washed garment can. If a wave is already present, begin with alignment, feed, handling, seam tension, and construction balance. LenZip notes that uneven tape placement and misaligned teeth can twist the slider path, and that improper presser-foot pressure can contribute to fabric creep and puckering. LenZip’s zipper sewing guidance
Washed-and-relaxed garment check
Then review the full garment after the intended wash route and sufficient relaxation for a meaningful visual assessment. Do not judge it only while it is damp, on a hanger, or pulled flat by hand. Inspect it buttoned or zipped as designed, laid flat, and worn or placed on an appropriate form when the product requires it.
Compare the same landmarks against the sewn-unwashed version: zipper center line, chain position, tape edge, seam ripples, facing edge, hem alignment, neckline or collar meeting point, and left-to-right front balance. If the visual defect appears only after wash, material response or finishing interaction becomes more plausible. If it remains concentrated next to stitches while the tape itself is straight, sewing and seam construction remain strong candidates.
A practical decision framework for buyers
Instead of asking “How do we flatten a wavy zipper?” first, use the location and timing of the distortion to direct the next sample.
The chain and tape wave together after washing. Review zipper suitability alongside fabric and wash route. Ask whether the tape appears to have changed relative to the garment edge, whether the condition is uniform or localized, and whether the same trim behaves differently in another fabric or construction. Compatible zipper flexibility and edge stabilization may be topics for development review; they are not automatic fixes. Hoshima’s overview
The tape is straight but fabric ripples beside the seam. Focus on seam puckering: feed balance, thread tension, operator handling, foot pressure, seam allowance bulk, and the stability of the garment edge. Check whether the ripple is worse in thicker joins, near a pocket, at a collar stand, or where facing layers begin and end.
The entire center front twists or bows. Review panel grain, cut symmetry, pattern shape, facing width, interfacing placement, and the sequence used to join the opening. Hoshima specifically identifies grain alignment as a possible contributor, especially around elastic or bias-influenced areas. Hoshima’s overview
The zipper operates poorly as well as looking uneven. Inspect chain alignment, tape placement, stitch clearance, and bulky seam crossings. Do not approve a cosmetic correction that introduces drag, catches fabric, or compromises closure operation.
Only one colorway, size, or wash treatment shows the issue. Hold the conclusion. That pattern can be a useful clue, but it does not identify the cause by itself. Build a small comparison set that changes one decision at a time, such as trim option, support construction, or sewing method, while retaining the same garment and wash route.
For related but distinct signs around denim construction, see this denim seam puckering review. It should not be used to relabel a chain-and-tape issue as ordinary seam puckering.
Numbered approval workflow before bulk production
- Write the visual standard. In the tech pack or approval notes, identify the zipper location, finished presentation, whether the garment is assessed zipped and unzipped, and the specific areas to inspect. Avoid vague language such as “no waviness” without a reference sample or clear defect description.
- Lock the assembled components. Record the approved fabric, zipper specification, facing or interfacing, seam construction, and trim placement as one package. A zipper approval detached from its garment construction is incomplete.
- Make the pre-sewing review. Check cut-edge direction, zipper length and placement marks, component alignment, and whether the opening edge remains stable during setup. If an edge requires support, evaluate the support in the actual construction rather than on a fabric strip alone.
- Approve the sewn-unwashed garment. Inspect the zipper line before wash and operate the slider through the full opening. Escalate obvious misalignment, localized puckering, or panel twist now, when the wash is not yet confounding the finding.
- Run the intended development wash route. Use the product’s planned wash and finishing sequence for approval. Do not infer post-wash performance from a generic laundering cycle, and do not treat a trim supplier’s guidance as a substitute for the brand’s garment-specific review.
- Relax, inspect, and compare. Review the washed garment against its sewn-unwashed counterpart and the approved visual standard. Document the defect location with consistent views: full front, close zipper line, relevant seam intersection, and inside construction where useful.
- Request a focused corrective sample. State what changed and what stayed constant. For example, ask to compare a revised edge-support approach while retaining the approved fabric, zipper, pattern, and wash route. Changing several variables at once may hide the real mechanism.
- Approve the production reference, not a verbal promise. Keep the final accepted sample, construction notes, zipper specification, and post-wash observations together. This creates a usable reference for in-line review and future reorders.
Compact approval notes to keep with the sample
- Identify whether the visible issue is tape/chain waviness, seam puckering, or front-panel distortion.
- Keep pre-sewing, sewn-unwashed, and washed-and-relaxed observations together.
- Review the actual zipper, fabric, facing/interfacing, and wash route as one assembled system.
- Note whether distortion changes when the garment is flat, closed, open, worn, or released from hand tension.
- Confirm smooth slider travel without stitching, tape, or fabric obstructing the chain.
- Ask for a single-variable comparison sample when a correction is needed.
- Retain the approved washed garment as the visual reference for production.
Choosing a development partner for zip-front products
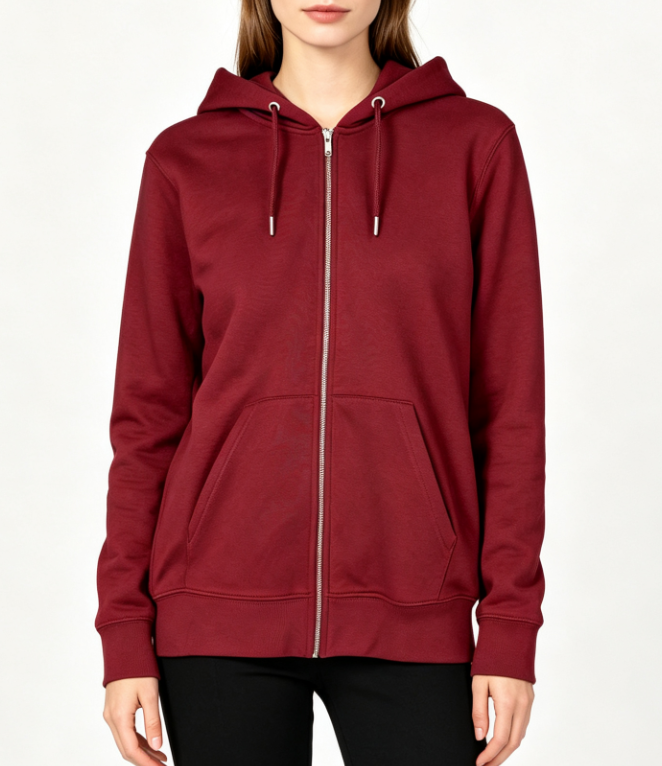
For a zip-front hoodie, specify the body fabric, facing construction, zipper style, embellishments near the opening, and wash treatment early. Review labels and pull branding where they affect seam bulk or handling. Ask the development team to keep these decisions with the approved sample so the production line can reproduce its construction.
JUNSHEEN supports OEM, ODM, and private-label apparel development, including sampling, fabric and trim sourcing, pattern work, graded size sets, wash treatments, and custom zippers and pulls. Explore Custom Zip-Up Hoodies when developing a zip-front program, or visit JUNSHEEN for broader apparel categories.
FAQ
Why is my zipper wavy after washing?
It may reflect different response between the garment fabric, zipper tape, support layers, and sewn seam after washing and relaxation. It can also be related to pre-existing assembly distortion that was less visible before wash. Compare the sewn-unwashed and washed garment before assigning a cause.
How do you stop a zipper from bunching?
First determine whether the bunching is in the zipper tape, the seam beside it, or the whole front panel. Then review alignment, fabric feed and handling, seam tension, edge support, facing/interfacing balance, and zipper compatibility in the complete garment. A quick flattening step is not a durable approval method by itself.
How do you stop fabric from puckering when sewing a zipper?
Review the garment edge as it feeds, the presser-foot setup, thread tension, stitch placement, seam allowance bulk, and whether the fabric is being stretched or dragged. A zipper foot and controlled alignment are commonly recommended for zipper insertion; the correct approach still needs confirmation on the actual fabric and construction. LenZip’s zipper sewing guidance
Can a wavy zipper be fixed after the garment is finished?
Sometimes rework may improve a localized construction problem, but buyers should not assume a cosmetic press will resolve differential material behavior after later washing. Review one reworked garment through the intended wash route before applying a correction more widely.
Is the zipper always the cause when the front looks distorted?
No. A bowed or twisting front can come from panel grain, pattern balance, cut asymmetry, facing or interfacing behavior, or sewing construction. The zipper can make the defect conspicuous without being the sole cause.
For a zip-front sampling review that includes fabric, trims, construction, and post-wash approval evidence, contact JUNSHEEN.