A size set proves whether an approved base pattern has been graded into a usable range. Approve it by measuring every selected size, fitting the range at its smallest and largest points, and checking product-specific balance. Do not approve a T-shirt, hoodie and jacket with one generic checklist: their openings, layers, mobility and construction behave differently.
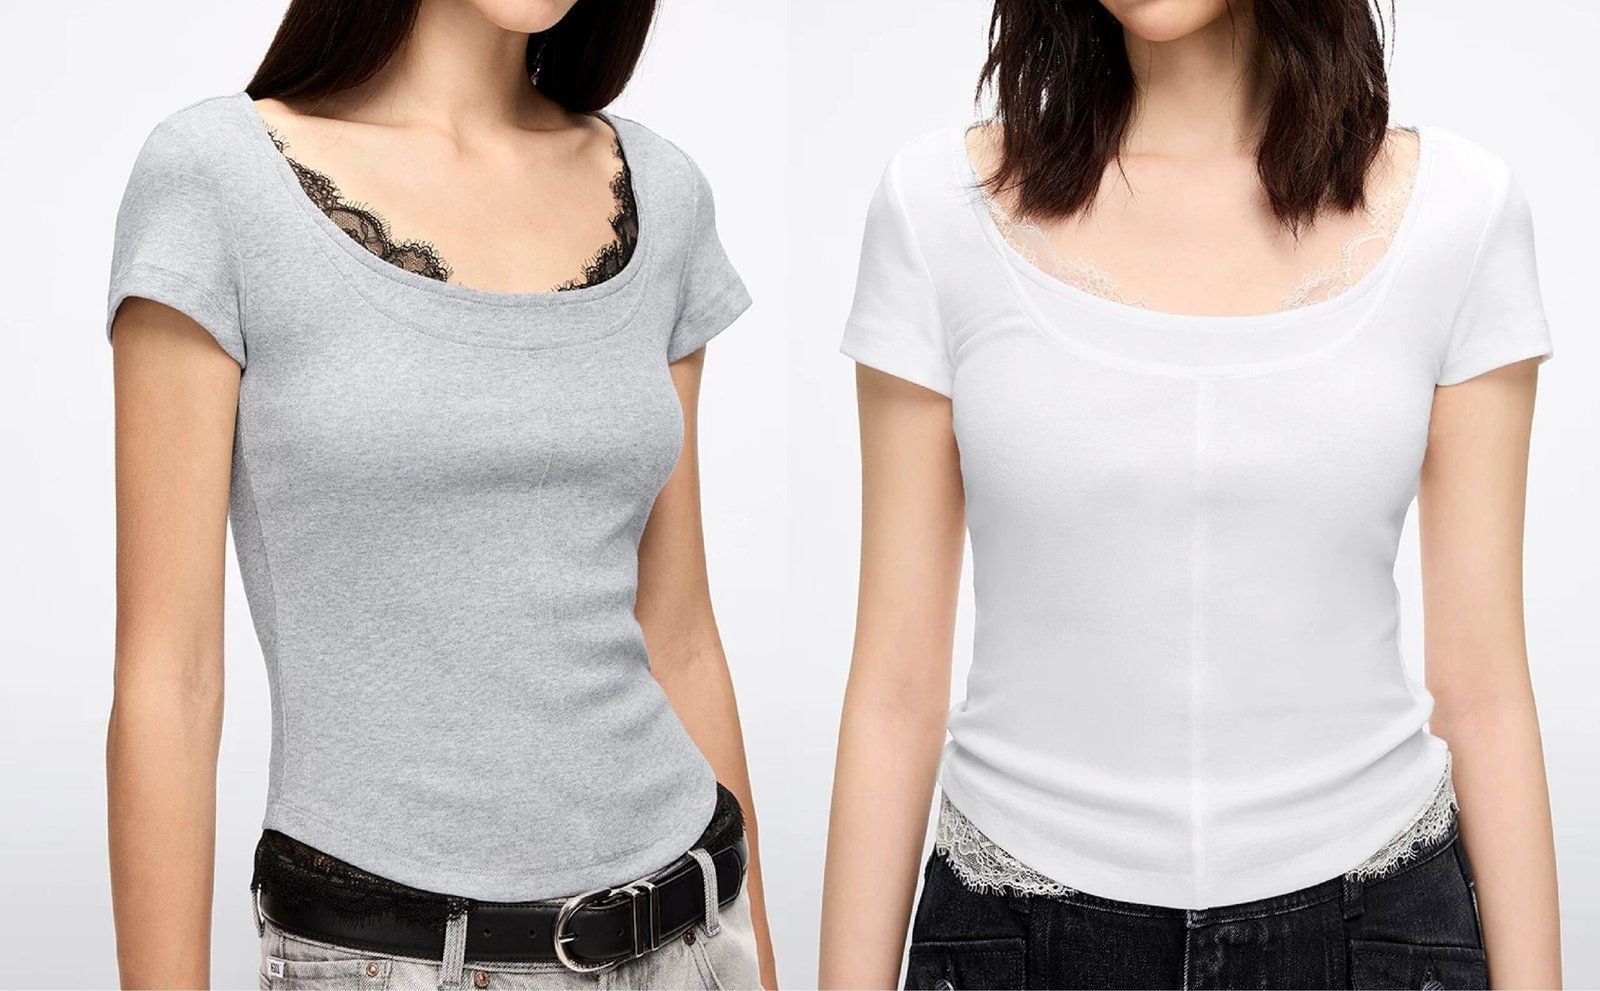
A T-shirt size set should preserve silhouette, neckline behavior and sleeve balance across the range.
What a size set is—and what it is not
A proto sample asks whether the design can be made. A fit sample develops the silhouette and balance in a base size. A size set checks whether the approved grading works across selected sizes. A pre-production sample then confirms the production-ready combination of fabric, trims, construction, artwork and packaging.
Factories may combine stages on simple projects, but the approval questions remain different. Label each sample with style, size, revision and date so comments cannot migrate to the wrong version. Approval of one middle size is not evidence that sleeve length, neck opening or pocket position works at both ends of the range.
Choose sizes that reveal the grading logic
Include the base size, the smallest and largest planned sizes, and any breakpoint where grade increments change. If the range includes tall, petite or extended-size blocks, sample the dimensions that define those blocks. The exact selection should follow risk: a fitted jacket may need more coverage than a relaxed T-shirt.
ISO 8559-1 standardizes anthropometric measurement definitions and supports development of body size-and-shape profiles. Use consistent body-measurement definitions, but keep body measurements separate from finished garment measurements. The difference between them includes fit ease and design intent.
Measure before fitting
Condition samples consistently, lay them without stretching and use one documented method for every point of measure. Record actual values beside specification and tolerance. Investigate patterns: if every larger size gains too much length, the grade rule may be wrong even when one sample barely passes tolerance.
Mark ambiguous measurement points with diagrams. Neck width, armhole depth, hood opening and curved seam lengths can vary by operator if the method is not defined. The same person should ideally measure approval samples, with a second check for critical dimensions.
T-shirt size-set checks
For T-shirts, review chest, body length, shoulder, sleeve length and opening, neck width and drop, armhole and hem sweep. Check that the neckline lies flat and can pass over the head without losing recovery. Side seams should not torque, and the hem should remain level after the agreed wash test.
Fit the smallest and largest samples. Confirm that the intended slim, regular, boxy or oversized silhouette survives grading. Pocket and print placement should be evaluated relative to the body, not simply moved by the same increment as the side seam.

Hoodies add hood, rib, pocket and layering variables that require separate size-set checks.
Hoodie size-set checks
Start with the T-shirt checks, then add hood height and width, face opening, neck seam, cuff and waistband recovery, pocket position, drawcord length and zipper behavior where applicable. Test the garment over its intended base layer. A hoodie that fits over a T-shirt may fail over the layer shown in campaign styling.
Watch whether the hood pulls the front neckline backward, whether the kangaroo pocket becomes too low in larger sizes, and whether rib compression remains comfortable. Heavy fabric can change drape and seam behavior as panels grow, so evaluate the approved production fabric.
Jacket size-set checks
Jackets require movement and layering tests. Measure chest, waist or hem, shoulder, cross-back, sleeve, bicep, cuff, armhole, center lengths, collar and closure positions. Check reach, driving posture, sitting and fastening over the specified layers.
For lined jackets, confirm that lining ease grows with the shell and does not pull at the armhole or hem. Zippers and snaps should align without forcing the front. Pockets must remain accessible, and protective or functional features must stay in their intended anatomical positions.
Convert comments into controlled corrections
Write one issue per comment. Include sample ID, size, point of measure, actual value, required value and a photo or sketch. Separate pattern changes from sewing defects. “Sleeve feels wrong” is not actionable; “increase bicep while retaining cuff and sleeve length” describes a testable direction.
When a correction changes the grade rule, update the full nest and measurement chart—not only the sampled size. Request a revised size when the change is material. Keep rejected measurement sheets so the reason for the final rule remains traceable.
Release bulk only with a complete approval record
Your production release should identify approved pattern revision, measurement chart, tolerances, size-set samples, fabric and shrinkage results, trims, artwork, labels, care instructions and packaging. State whether any comments remain open. Verbal approval in a messaging app is not a controlled production document.
Use the private label development service to connect the size-set decision with labels, trims and the final product specification. The goal is not to make every size mathematically similar; it is to make the intended fit consistently recognizable across products and sizes.
Define the measurement protocol
Every point of measure needs a name, diagram and method. State whether a garment is zipped, buttoned, relaxed, gently smoothed or stretched. Define where curved measurements begin and end, how rib and elastic are handled, and whether pairs such as sleeves are both checked.
Use the same calibrated tools and flat surface. Let garments recover from packing and condition them according to the agreed procedure. Fabric moisture, steam and handling can change a reading. If two operators measure differently, resolve the method before treating the difference as a sewing defect.
Record specification, tolerance, actual value and pass/fail status. Trends matter: a series that gradually approaches the upper tolerance may indicate a grading or shrinkage issue even when each individual value passes.
Separate pattern corrections from workmanship defects
A consistent issue across all samples usually points to the pattern, grade rule or specification. A problem on one side or one garment may be cutting or sewing. Fabric torque, relaxation and finishing can create another category. Diagnose before issuing a correction.
If the sleeve is short in every size, review the base measurement and grade. If only one sleeve is short, inspect sewing and cutting. If the garment shortens after care, examine fabric shrinkage and finishing. Sending “add length” without the cause can create the opposite problem in bulk.
Ask the factory to state the corrective action and the document it changes. Pattern amendments should update the pattern version and measurement chart where relevant. Workmanship corrections should update line instructions or quality checkpoints.
Review visual proportions across the range
Not every element should grade at the same rate. Pocket dimensions, label size, logo scale, topstitch distance, hood drawcord and zipper pull may remain constant while placement shifts. Look at the complete garment on-body to decide whether details stay balanced.
For T-shirts, compare sleeve-to-body and neck-to-shoulder proportions. For hoodies, compare hood volume, pocket size and rib depth. For jackets, review collar, lapel or front overlap, pocket access, cuff and hardware scale. The largest sample should look intentionally designed, not like a stretched version of the base.
Use a front, side and back photo grid at consistent scale. Annotate placement issues directly and keep the grid with the approval record.
Include shrinkage and recovery in size-set approval
Measure selected samples before and after the agreed care or finishing test. Dimensional change can differ by direction and component. A cotton body, rib neck and zipper tape may not shrink together. The approved production measurements must reflect the garment state the customer receives and the care promise.
For stretch knits, check recovery after wearing or extension. A garment can measure correctly on the table but become loose at the neck, cuff or knee after use. For insulated jackets, allow fill to recover from packing before evaluating loft and measurements.
Record the material lot and test conditions. If bulk fabric changes, repeat relevant validation rather than assuming the first size set still applies.
Connect grading to markers, labels and packing
Once grading is approved, verify that pattern pieces and marker files carry the correct size codes. Mixed components—such as a medium sleeve cut with a large body—can pass through sewing if bundle controls are weak. Ask how cut parts are labeled and separated.
Check that woven size labels, care labels, hangtags, polybag stickers and carton assortments map to the same size system. If the customer-facing label differs from the internal pattern code, document the translation. This is particularly important for regional sizing or dual-size labels.
Pack one full assortment as a trial. Confirm fold method, bag dimensions, barcode scanning and carton ratio. Packaging should not compress or distort the largest garment simply because it was designed around the base size.
Create an approval matrix
Use one row per product and selected size. Columns should include measurements, fit, construction, fabric, color, artwork, labels, care test, open comments and approval signature. A product is released only when every required field is closed or a documented concession is accepted.
Link photos and comment sheets to the matrix by sample ID. Do not write “all good” in a chat and assume every department sees it. The production team needs a clear release revision and the merchandising team needs to know which open risks remain.
If T-shirts, hoodies and jackets share a collection, add a cross-product review for size naming and intended layering. A customer wearing medium in the T-shirt should understand whether medium in the jacket is designed to fit over it.
Frequently asked questions
Is a size set required for every product?
Risk determines the need. A repeat style in a proven block may require limited confirmation, while a new fitted jacket or extended range deserves broader validation. Document the decision rather than skipping the stage by habit.
Can measurements alone approve a size set?
No. Measurements confirm the specification, but on-body fit reveals balance, movement, pressure and visual proportion. Use both.
Should the largest size have wider tolerances?
Not automatically. Set tolerances according to manufacturing capability and fit sensitivity. If a process cannot hold a critical requirement, improve the process or specification rather than hiding the problem with an arbitrary wider range.
What happens if one size fails?
Identify whether the cause is isolated or part of the grade rule. Correct the pattern or workmanship, update affected documents and resample the failed size—and adjacent sizes when the rule change can influence them.
Who should sign the approval?
The responsible brand product developer or authorized buyer should approve the documented sample set, with the factory merchandiser confirming the production revision. Names, dates and conditions make the release traceable.